Landscaping time!
Sorry about the terrible lighting in the photos, it was so dark and overcast today, it was difficult to get any decent photos at all.
Anyway, I knew I wanted to add some greenery to the Mausoleum, so I used Super-Tac glue and medium green flocking to add some creepers, and light green flocking for moss along the roof and some of the tiles.
I added small tufts of "dead grass" made from twine around the walls of the Mausoleum and the headstones. To make them, I used a tip I picked up on Pinterest - unravel the end of a piece of twine and then cut short lengths off it. Pick them up individually using tweezers and glue them on end, onto the board (I used using Super-Tac glue).
A close up of the headstones before landscaping. They are from Lemax Spooky Town.
First I used medium green scatter across the board, followed by "dead grass", again made from twine by unraveling the end of a very fine twine and snipping small pieces off, all over the top of the board. I then added small plants and shrubs using coloured craft moss (which I bought in various in packets from Spotlight).
At this point I decided that there was too much green!! I thought about for a day or so, but still couldn't stand it, so I painstakingly picked most of it off until I thought it looked better, and then added lots of "dirt", i.e. dark brown scatter, and "gravel" scatter. When I was happy, I set the landscaping scatter with "wet glue" - watered down white glue with a few drops of dishwashing detergent added to it - and let it dry outside.
When dry I decided it needed some sort or fencing to finish it of, so I added a crooked fence made from toothpicks painted black. I help keep them semi-upright, I made a "dead hedge" base from more craft moss.
Now, it is 99% finished I think?! Is any work actually ever properly finished, lol? Tomorrow is Halloween however, so if I decide to do anything more, it might have to wait for a "refurbish" next Halloween :-)
Showing posts with label landscaping. Show all posts
Monday, 30 October 2017
Saturday, 7 October 2017
The Dressmaker's Cottage: Exterior Trim, Painting & Landscaping
Gah, the cottage is getting so close to completion! All very exciting, but of course I will still have all of the inside to do, lol :-)
I have added a little timber capping to the chimney and have started on the trim under the eaves. The chimney needs some more paint work at this stage, it's all too creamy, lol.
The chimney is looking a little better now, so I've begun painting the cladding in Antique White, with a light sanding in between to make it look a little more weathered and shabby.
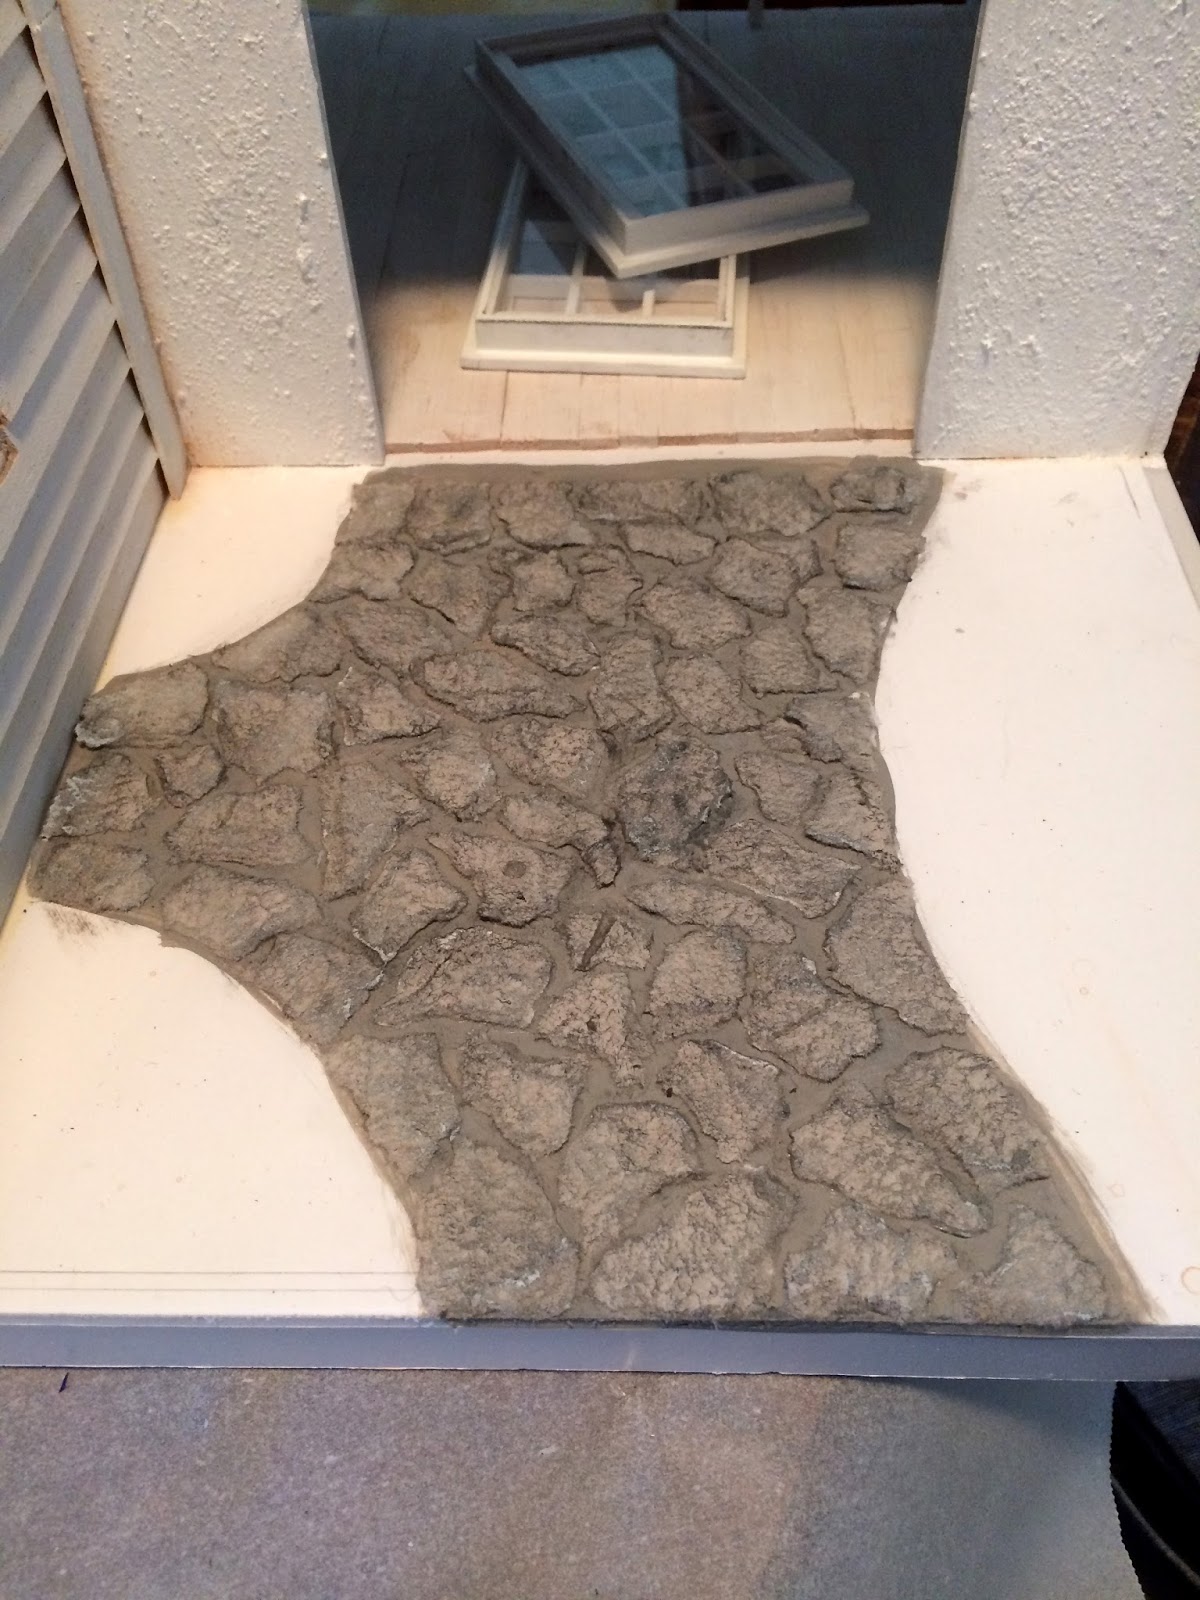
Now it's time for the front pathway in the courtyard. I decided to do "crazy paving", made from egg cartons torn into rough shapes. I painted the pathway with grey paint first and then glued the egg cartons "stones" onto the path like putting together a puzzle.
When the glue was dry, I started painting the stonework in dark greys and browns.
Like the chimney stones, I sealed the "stones" with ModPodge, and then (when dry), I will grout the stones.
For a bit of detail on the sewing room gable, I made a little vent out of balsa offcuts and cardboard. I made the inside piece out of a rectangle of cardboard cut to size, with regular slits cut almost to the edges. I then inserted the tip of a scalpel into the bottom of each slit and eased it up to look like the vent edges.
Oh my gosh, the number of times I repainted this front door is embarrassing!! I knew I wanted a weathered, shabby chic look which is quite easy to achieve with sanding and rough painting... but I could NOT decide on a final colour! Lucky for me, each layer of paint colour just adds to the patina, LOL. I think I have finally settled on this pretty grey-blue. I will paint the door handles to age them too, so they won't be so shiny and new-looking ;-)
Here, the doors are in place, and the grout has dried on the crazy paving. I've cut faux grass inserts from a roll of artificial moss from Spotlight, and the pre-made picket fence is from eBay. The moss was a little thick, so I peeled the black foam backing off it, before gluing it to the foam board base.
The awning over the front door is glued in place with hot glue. I went through a couple of different covers and colours for the awning before deciding on this paper, which I ModPodged to seal. I trimmed the edges with pinking shears.
At this point you can see that I've also painted the roof shingles - I forgot to take a photo! There was a lot of fluffing about with colour washes and I've made a lot of mistakes, but I'm running out of time to do much more so it will have to stay as it is for now :-)
Now I've taken a piece of fern garland I bought from Alpha Stamps (they don't appear to sell it any more, which I am really bummed about) and hot glued it across the awning. I also had some shrubs I bought from Minimum World which I added to the grass. I think it's starting to look good!
Here you can see I have glued the timber framing to the base and have puttied the joins on the corners. It just needs some paint - although I am yet to decide on a colour, lol. I have added some scenic scatter around the edges of the grass (and in spots across the roof tiles) to resemble moss.
As a little treat, on the corner of the awning I added a tiny birds nest with eggs, which I found in an Etsy shop :-)
Caroline uses a wonderful-looking (and cheap!) faux greenery garland as her vines, but despite extensive searching, I couldn't find anything similar here in Australia. I made the vine on this side of the cottage from a branch trimmed from this garland from Spotlight, which I bought on sale.
You can also see below, that I finally decided on a French grey-blue paint for the timber base trim :-)
Oh my gosh, just a few final touches, and the outside is almost done!!
I have added a little timber capping to the chimney and have started on the trim under the eaves. The chimney needs some more paint work at this stage, it's all too creamy, lol.
The chimney is looking a little better now, so I've begun painting the cladding in Antique White, with a light sanding in between to make it look a little more weathered and shabby.
Now it's time for the front pathway in the courtyard. I decided to do "crazy paving", made from egg cartons torn into rough shapes. I painted the pathway with grey paint first and then glued the egg cartons "stones" onto the path like putting together a puzzle.
When the glue was dry, I started painting the stonework in dark greys and browns.
Like the chimney stones, I sealed the "stones" with ModPodge, and then (when dry), I will grout the stones.
For a bit of detail on the sewing room gable, I made a little vent out of balsa offcuts and cardboard. I made the inside piece out of a rectangle of cardboard cut to size, with regular slits cut almost to the edges. I then inserted the tip of a scalpel into the bottom of each slit and eased it up to look like the vent edges.
Oh my gosh, the number of times I repainted this front door is embarrassing!! I knew I wanted a weathered, shabby chic look which is quite easy to achieve with sanding and rough painting... but I could NOT decide on a final colour! Lucky for me, each layer of paint colour just adds to the patina, LOL. I think I have finally settled on this pretty grey-blue. I will paint the door handles to age them too, so they won't be so shiny and new-looking ;-)
Here, the doors are in place, and the grout has dried on the crazy paving. I've cut faux grass inserts from a roll of artificial moss from Spotlight, and the pre-made picket fence is from eBay. The moss was a little thick, so I peeled the black foam backing off it, before gluing it to the foam board base.
The awning over the front door is glued in place with hot glue. I went through a couple of different covers and colours for the awning before deciding on this paper, which I ModPodged to seal. I trimmed the edges with pinking shears.
At this point you can see that I've also painted the roof shingles - I forgot to take a photo! There was a lot of fluffing about with colour washes and I've made a lot of mistakes, but I'm running out of time to do much more so it will have to stay as it is for now :-)
Now I've taken a piece of fern garland I bought from Alpha Stamps (they don't appear to sell it any more, which I am really bummed about) and hot glued it across the awning. I also had some shrubs I bought from Minimum World which I added to the grass. I think it's starting to look good!
Here you can see I have glued the timber framing to the base and have puttied the joins on the corners. It just needs some paint - although I am yet to decide on a colour, lol. I have added some scenic scatter around the edges of the grass (and in spots across the roof tiles) to resemble moss.
As a little treat, on the corner of the awning I added a tiny birds nest with eggs, which I found in an Etsy shop :-)
Caroline uses a wonderful-looking (and cheap!) faux greenery garland as her vines, but despite extensive searching, I couldn't find anything similar here in Australia. I made the vine on this side of the cottage from a branch trimmed from this garland from Spotlight, which I bought on sale.
You can also see below, that I finally decided on a French grey-blue paint for the timber base trim :-)
Oh my gosh, just a few final touches, and the outside is almost done!!
Subscribe to:
Posts (Atom)