Thursday, 21 June 2018

Hufflepuff Roombox Finished

Yay, the Hufflepuff Roombox is finished!  I'm pretty pleased with how it all came together and it was a good learning experience for making a lot of the pieces.

The kit comes with pieces of perspex to make a dust cover which is great, as dusting these tiny pieces would be annoying, lol.


I printed the fabric for the bed cover, chair cushions, bed cushions, rug and curtains on special paper-backed fabric designed for ink jet printers.  The curtain tie backs and tassels are made from gold thread, and the bed throw is a tiny piece of fabric.


I did decide that I wasn't fond of the white bird cage as it was difficult to see the owl inside, so I painted it with Tim Holtz Distress Paint in Tarnished Brass.


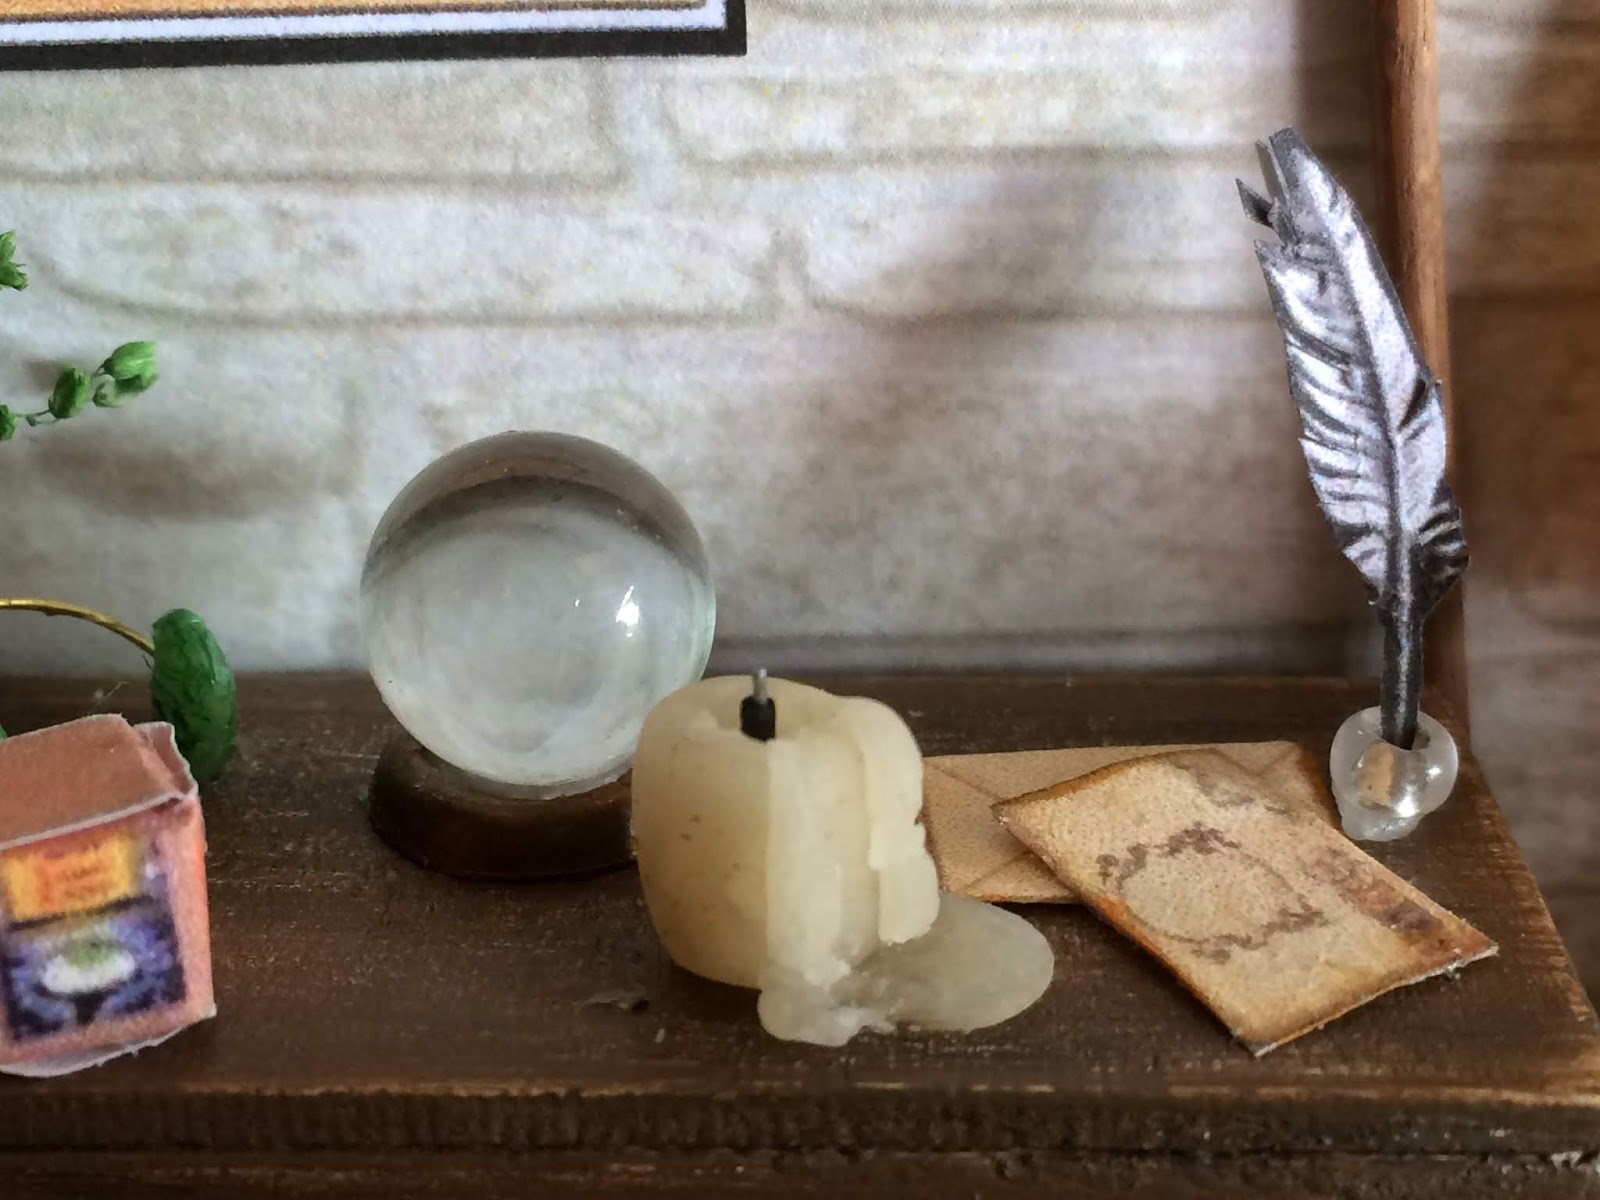
I made the candles from Sculpey, my first ever attempt.  I also made the green ear muffs (for using when repotting mandrakes!) from Sculpey and wire.  The envelopes are printies, as is the quill, the Weasley Wizards candy box and the Mandrake poster. The ink pot is a bead, and I bought the 1:24 scale crystal ball online.


When I glued the pieces of the desk hutch together, I must have bumped it before it dried completely, as it is slightly wonky.  So I did what all good students do when they have a wobbly desk - I stuck a copy of The Quibbler under the leg!!  Worked perfectly :D


The potion bottles are made from plastic beads and I made the text books and scrolls from printies.


Just for my own future reference, the books I made for the bookshelf include Hogwarts: A History,  Advanced Potion Making, Ancient Runes Made Easy, Unfogging the Future, The Hairy Heart, When Muggles Attack, Defence Against the Dark Arts, A History of Magic, Easy Spells to Fool Muggles, Which Owl?, Owl Breeds, Gilderoy Lockhart's Magical Me, Winogrand's Wondrous Water Plants and  - of course! - Newt Scammander's Fantastic Beasts and Where to Find Them.


The recipe sheet on the desk is too small to read, but it is for Polyjuice Potion.  The mortar and pestle and wand I bought online.  The basket on the shelf to the left contains Dragon Eggs!


I also made the potted plant - my version of Neville Longbottom's Mimbulus mimbletonia -  out of Sculpey and painted it.  The pot came with the kit.


I made the plant from pieces in the kit - it is supposed to look like the flowers have eyes, lol.


The little suitcase under the desk is a printie.


All in all, it was pretty fun!!

Saturday, 16 June 2018

Hufflepuff Roombox: A pause in proceedings, a project for me!

So it was my birthday last week and I decided that since it was a wet and gloomy week, I should take a quick-and-dirty detour from working on the Dressmaker's Cottage and make something for me!

Some time ago I stumbled across this video on Youtube by The Hollycopter and being a Hufflepuff - as are two of my 3 daughters - I fell in love with it and bought the same roombox kit on eBay! I believe it is from Cuteroom, and called "The Heart of the Ocean".

This is the picture on the box, and yes, the instructions are all in Japanese (?), but there are pictures :-)


This is the beginning; the floor and wall covered...The holes are for the music box and the light.


Constructing the bed and linen... I found the fabric via the link in the video and printed it out on the printer fabric The Hollycopter recommended.  I cropped the fabric sample to make the cushions, rug and curtains.


Here's the obligatory owl!  She is from Alpha Stamps, and I bought the cage on eBay.  I'm not sure if I like the white cage it not, I might paint it.


The room is starting to come together.


Better! I painted the furniture and window frames with Jo Sonja wood stain gel in Jacobean Oak and  lightly sanded them lightly to add texture. Then I dabbed the sanded areas with Tim Holtz Distress Paint in Walnut Stain.


As I mentioned before, I printed out the curtains on printer fabric using my inkjet printer.  I pinned the folds and set it with hairspray - forgetting that I had not set the ink on the fabric and it ran everywhere when the fabric got wet!!  Fortunately, it just faded it a little, which adds to the effect I was going for ;-) Phew!


A little suitcase made from a printie I found on Pinterest.


A quill made from paper, the ink pot is a bead and the envelopes are printies.


Newspapers and potion bottles made from beads.


The curtains in place, hung on stained toothpick "rods", with ties and tassels made from thread.


A Madrake poster and the light fitting made from beads and wire.  No matter what I do I can't make the LED light bulb work - I am pretty sure the battery pack that came with the kit is broken as I tried it with two sets of new batteries and on two spare LEDs and couldn't make any of them work.  So sad :(  New battery packs are inexpensive, I will just have to wait until my next mini order.


I played with Sculpey for the first time and made a couple of tiny candles, and this Harry Potter plant!  It is supposed to be my take on Neville's Mimbulus mimbultonia plant :-)


I think nearly everything is done now, except for making a blanket for the bed (because comfy), then  it is getting the time to put it all together!

Wednesday, 9 May 2018

The Dressmaker's Cottage: Bathroom Progress

I've been playing with the bathroom for the last couple of days.  I started by making a faux roman blind for the dormer window.  I cut a section of fabric with lace trim to fit the window from an old handkerchief, and glued a short piece of white-painted trim (skinny sticks) either side of the top.  I added a couple of folds, which I glued in place, and then glued the blind to the top of the dormer.

Next, I used most of the remainder of the hankie to make a shower curtain.  I folded the top down and threaded 4mm jump rings (in antique bronze) through the lace to act as curtain rings.

The heaviest gauge wire I had in my stash was only 20 but I used it anyway! I cut a length to fit and painted it with tarnished brass distressing paint. Then I threaded the curtain onto the rod, and glued a jewellery spacer on either end.

Using pins, I pleated the curtain roughly and sprayed it heavily with hair spray and left it to dry overnight.


Here is the dormer blind and shower curtain in place - please excuse the dark photos as it is over cast today :(


Of course then I had to check how the curtain looked with the bath tub!  The bath tub as is, is pretty boring and uninspiring:


I used the tarnished brass paint again on the taps, and the legs but the outside was bothering me.

I only have acrylic paints on hand, which obviously won't adhere to the porcelain so I was stumped for a while, until I remembered that I have a porcelain pen in my stash.  It needs to be baked on to ensure a permanent finish - which I didn't want to do for fear of ruining it! - but I think it will be OK as long as it isn't handled too much.  I was pretty happy with the shabby, mottled look of one rough coat with the pen.


I felt it needed a bit more aging though, so I went over the dry ink first with a Walnut Stain distressing paint dabber, and then a Weathered Oak (grey) paint dabber.  Not too bad?


I also added a bit of staining to the drain ;-)


And here it is in situ.


I think it is coming along OK, considering that Shabby Chic is NOT my thing at all, lol!!


This is the bathroom with the sink and toilet from the set the tub came from added in.


I'm not happy with the boring toilet as it is, but I am not sure what to do with it to help it tie in with the bath tub?  I was originally thinking of painting the seat pale pink but perhaps that would clash with the black tub?  Although it would probably clash less than the timber seat does now! 

I will also age the sink taps with tarnished brass to match the bath taps, and possibly mount a shelf above the bath for storing toiletries.  I also need to hang the mirror above the sink.  Then, once the stair railing is complete, the bath room will be ready for accessories :-)

Tuesday, 8 May 2018

The Dressmaker's Cottage: Fixing and Futzing

I found the glue gun back this morning and went to work fixing the awning, fence and greenery which was knocked off when the house took a tumble (the shelf it was sitting on collapsed!), so it's nice to have that back on before it all got lost - or eaten by the cat!

While I was at it, I added a house number from a set by Tim Holtz. Cute :-)


Then I glued in the blinds and curtains I ordered from a local seller on Etsy.  I am really pleased with how they turned out, they suit the parlour nicely!  I will try and make the other blinds myself with bits of lace.


I have no idea where to even start with the other blinds but I guess I will learn, lol.  I have the two small dormer windows in the bedroom and bathroom and then the larger bedroom window and the kitchen window.  I don't have any lace wide enough to use in one piece in my stash which is a shame, so I might see if my Mum has any scraps she could share :-)

Monday, 7 May 2018

The Dressmaker's Cottage: Interior Trim Finished

I pottered away this week finishing off the interior trim. I had to paint some more skinny sticks and trim, and then finished off the cornices, skirting and other bits of trim.

In between, I worked on the fireplace, as that had to be installed before I could finish the trim on that wall.

I added a small piece of leftover textured brick paper to the rear of the mantel, and painted it. I made a hearth out of a scrap piece of balsa wood and painted it too, then added a little highlighting to the mantel with a Tim Holtz dabber in Weathered Oak.  It's not great, but you can't see too much of it as it is side-on to the rear opening.


It's nice to have the French doors glued in so that the cat will stop knocking them out, lol.  I aged the handles with some Tim Holtz distress ink in Tarnished Brass and used beads (also aged with the ink) as handles on the inside.


Next up is to complete the railing for the staircase return in the bathroom, but I soon discovered that I don't have any spindles in 1:12 scale (heaps in 1:24 scale lol) so I have had to order some and will wait for them to arrive.

In the mean time, I will work on the curtains and blinds.  I ordered a couple of pre-made blinds and a set of curtains on Etsy from a local mini-maker, which are really cute!  They will go in the bump-out.  This was originally going to be the sewing room, but now I think I will swap the sewing room with the lounge area so that you can see all the cute sewing miniatures more easily. It would be a shame to have everything tucked away where you can't have a good look at it all :-)

So, for now I am scrounging through my fabric box to see if I have anything suitable for blinds for the two dormer windows, and curtains for the bedroom and kitchen windows.