Tuesday 31 October 2017

Halloween 2017: The Mini Mausolem diorama

Happy Halloween peeps!

It was actually sunny today, but that made it almost as difficult to take nice photos of the diorama without it fading out the colours.  Oh well, one day I will learn how to use my camera properly (and/or how to use Photoshop ;-) )

Remember, if you click on a photo, it will make it bigger.


There are a lot of things I would do differently, but I think it turned out pretty well for my very first diorama :-)


Monday 30 October 2017

The Mini Mausoleum: Part 4

Landscaping time!

Sorry about the terrible lighting in the photos, it was so dark and overcast today, it was difficult to get any decent photos at all.

Anyway, I knew I wanted to add some greenery to the Mausoleum, so I used Super-Tac glue and medium green flocking to add some creepers, and light green flocking for moss along the roof and some of the tiles.


I added small tufts of "dead grass" made from twine around the walls of the Mausoleum and the headstones. To make them, I used a tip I picked up on Pinterest - unravel the end of a piece of twine and then cut short lengths off it.  Pick them up individually using tweezers and glue them on end, onto the board (I used using Super-Tac glue). 


A close up of the headstones before landscaping.  They are from Lemax Spooky Town.


First I used medium green scatter across the board, followed by "dead grass", again made from twine by unraveling the end of a very fine twine and snipping small pieces off, all over the top of the board.  I then added small plants and shrubs using coloured craft moss (which I bought in various in packets from Spotlight).


At this point I decided that there was too much green!!  I thought about for a day or so, but still couldn't stand it, so I painstakingly picked most of it off until I thought it looked better, and then added lots of "dirt", i.e. dark brown scatter, and "gravel" scatter.  When I was happy, I set the landscaping scatter with "wet glue" - watered down white glue with a few drops of dishwashing detergent added to it - and let it dry outside.

When dry I decided it needed some sort or fencing to finish it of, so I added a crooked fence made from toothpicks painted black.  I help keep them semi-upright, I made a "dead hedge" base from more craft moss.


Now, it is 99% finished I think?! Is any work actually ever properly finished, lol?  Tomorrow is Halloween however, so if I decide to do anything more, it might have to wait for a "refurbish" next Halloween :-)

Thursday 26 October 2017

The Mini Mausoleum: Part 3

Now it's time for the windows and turrets!  Yes, I did decide to add the turrets :-)

The window frames were painted black first, and then glued in place on the exterior.  I'm loving the Gothic effect, which is what drew me to the kit in the first place.

Left side:


Right side:


I painted the turrets with texture paste and paint, to match the rest of the Mausoleum, and affixed them to the roof corners.  It needed a little something else, so I added spikes made from the tips of toothpicks, painted black.  I tried using tacky glue to affix them to begin with, but they kept falling over, so I ended up using tiny dabs of Tacky Wax. Works great!


The turrets needed a little something too, but all I could find in my stash that would fit was this little skull. Looking better :-)  I think it might have come from a Spooky Town kit too.


As you can see from the last pic, it was now time to move onto landscaping the diorama :-)  I started by painting the board (which is a plain craftboard placemat from the craft section of Bunnings) a dark brown.  Leaving spaces for the headstones, tree, the path and the Mausoleum, I covered the rest with pumpkin-orange thin acrylic felt which I pulled from my stash.  Although it's not it's Autumn here in Australia at this time of year, I wanted to go with a dead-foliage and grass look.

I then made the pathway from pieces of egg carton, cut into rectangles, painted grey and then highlighted with off-white acrylic paint - similar to the exterior of the Mausoleum - to simulate stone pavers.


With the Lemax Spooky Town headstones, tree and the Mausoleum in place, the Halloween diorama is starting to take shape!


I added a dead vine to the exterior, using a dead root from a weed (which I had purposely set aside to dry the last time I did the weeding in the garden :-), which I attached using Tacky Wax. I started using hot glue but it left really obvious blobs of glue.


Next up, the rest of the landscaping!

Sunday 22 October 2017

The Mini Mausoleum: Part 2

After the texture paste dried on the exterior of the mausoleum, it was time to paint it!  I still haven't glued the roof pieces on, so I can get access to the inside.

I used a combination of my model paints on the exterior, starting with the darkest greys and working up to a dry-brushed coat of off-white.

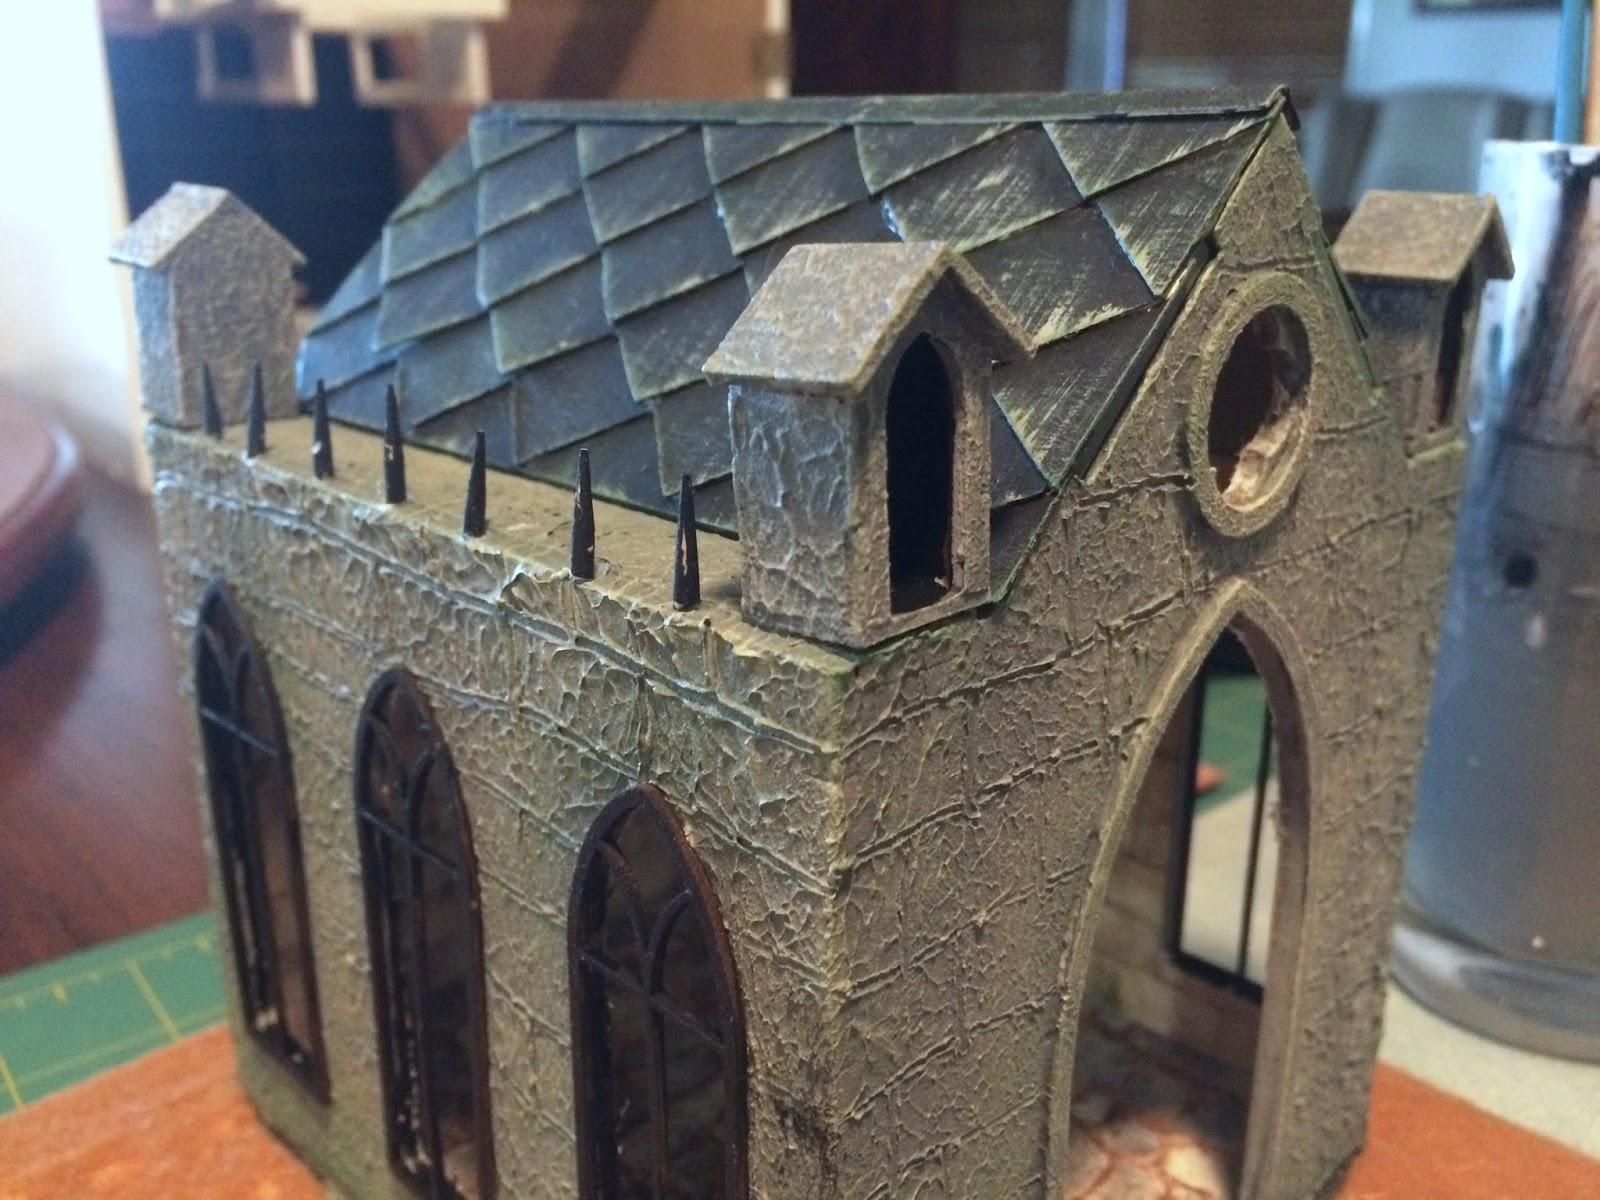
Here you can see it before the final highlighting. From memory, the paints I used were mainly Vallejo Gunmetal Grey, Cold Grey and Coldmetal Grey, with Bone White as the highlighter.


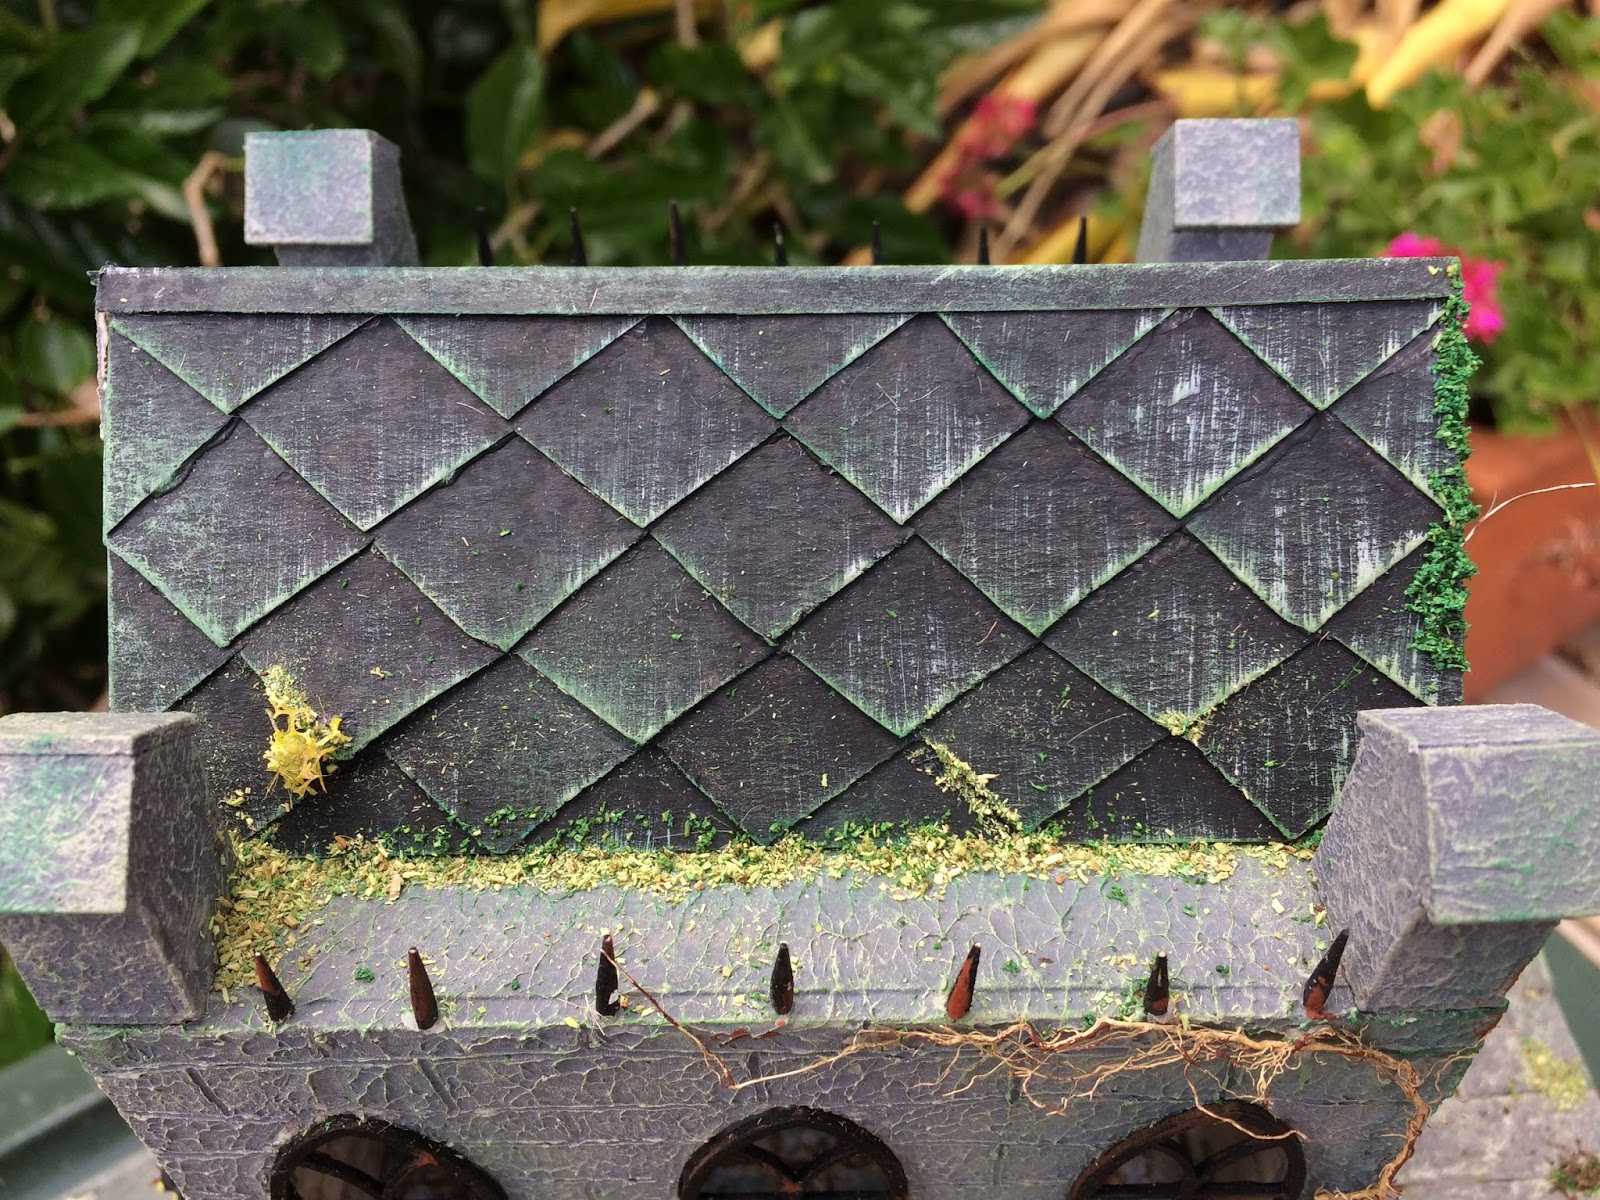
To the roof tiles, I added highlighting with Bone White and Sap Green, to mimic moss.  I also ended up adding raw earth and sap green to the bottoms of the walls to mimic dirt and moss, although it hard to see in the photos.


After painting, I decided to add some stone-effect paper to the flooring and walls of the interior.   I was going to try stenciling with paperclay, but eventually decided that with the doors on, you wouldn't be able to see it clearly enough to make the effort worthwhile :-)


I really love the wood cross. It is 1:12 scale, but looks good as an oversize wall piece in the 1:48 scale Mausoleum.  It was from Ryan's Realm.


 For a bit of fun, I added a tiny rubber snake from a Lemax Spooky Town collection, and a cross from a model train scale box of figures I had bought for my terrarium.


Next up, it was time for the front doors.  I used the piece of board which had I popped out from the doorway on the front wall of the kit. I cut it in half, scored lines to indicate boards, and painted and weathered it. The paint was predominantly Jo Sonja Raw Earth, with a bit of Sap Green at the bottom.


I used a black acrylic wash over the paint, and when it was dry I added door handles.  I used two jump rings from my stash of jewellery findings, and attached them using thin strips of cardboard folded in half and glued to the door.  When the glue dried, I gently dabbed on Tim Holtz distressing ink in Tarnished Brass.


The doors in place, below.  It's been hard to get good photos with all the overcast days we've been having :(


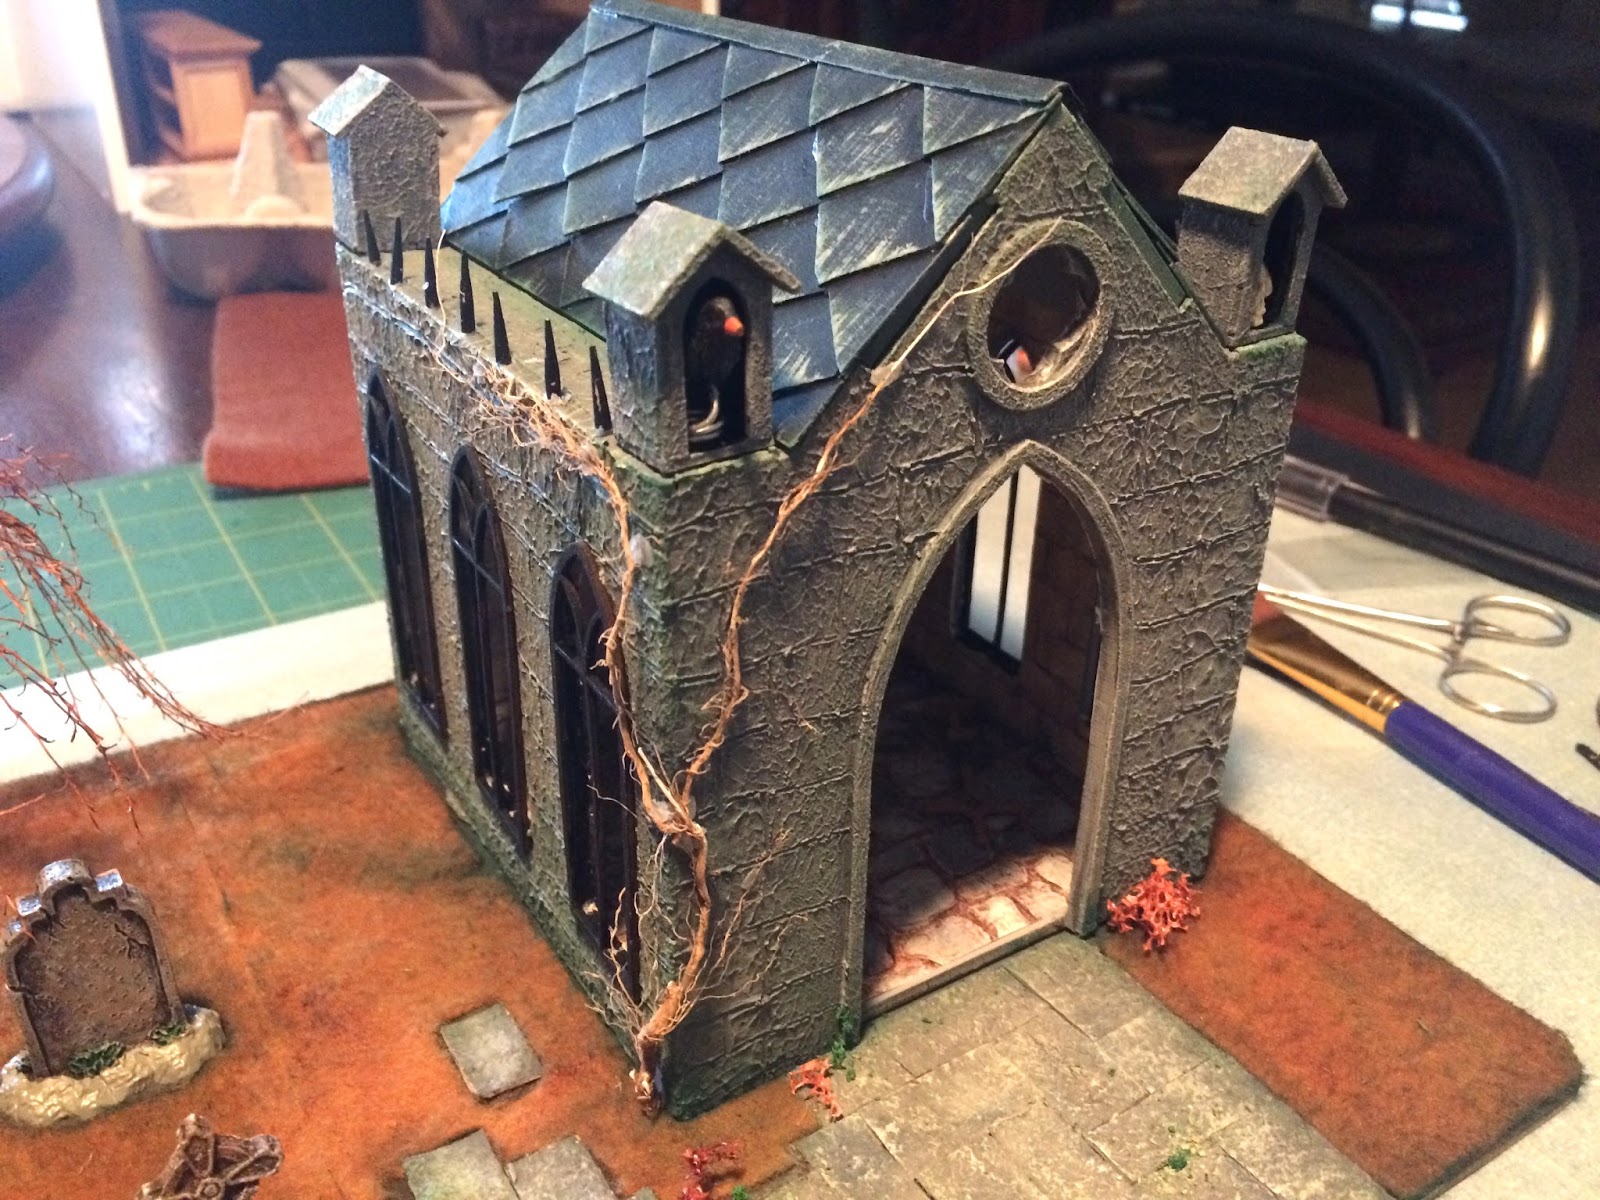
And here's a pic with the front two turrets in place.  I can't decide if I want the turrets or not, which is why I haven't painted them yet?