The window frames were painted black first, and then glued in place on the exterior. I'm loving the Gothic effect, which is what drew me to the kit in the first place.
Left side:

Right side:


I painted the turrets with texture paste and paint, to match the rest of the Mausoleum, and affixed them to the roof corners. It needed a little something else, so I added spikes made from the tips of toothpicks, painted black. I tried using tacky glue to affix them to begin with, but they kept falling over, so I ended up using tiny dabs of Tacky Wax. Works great!
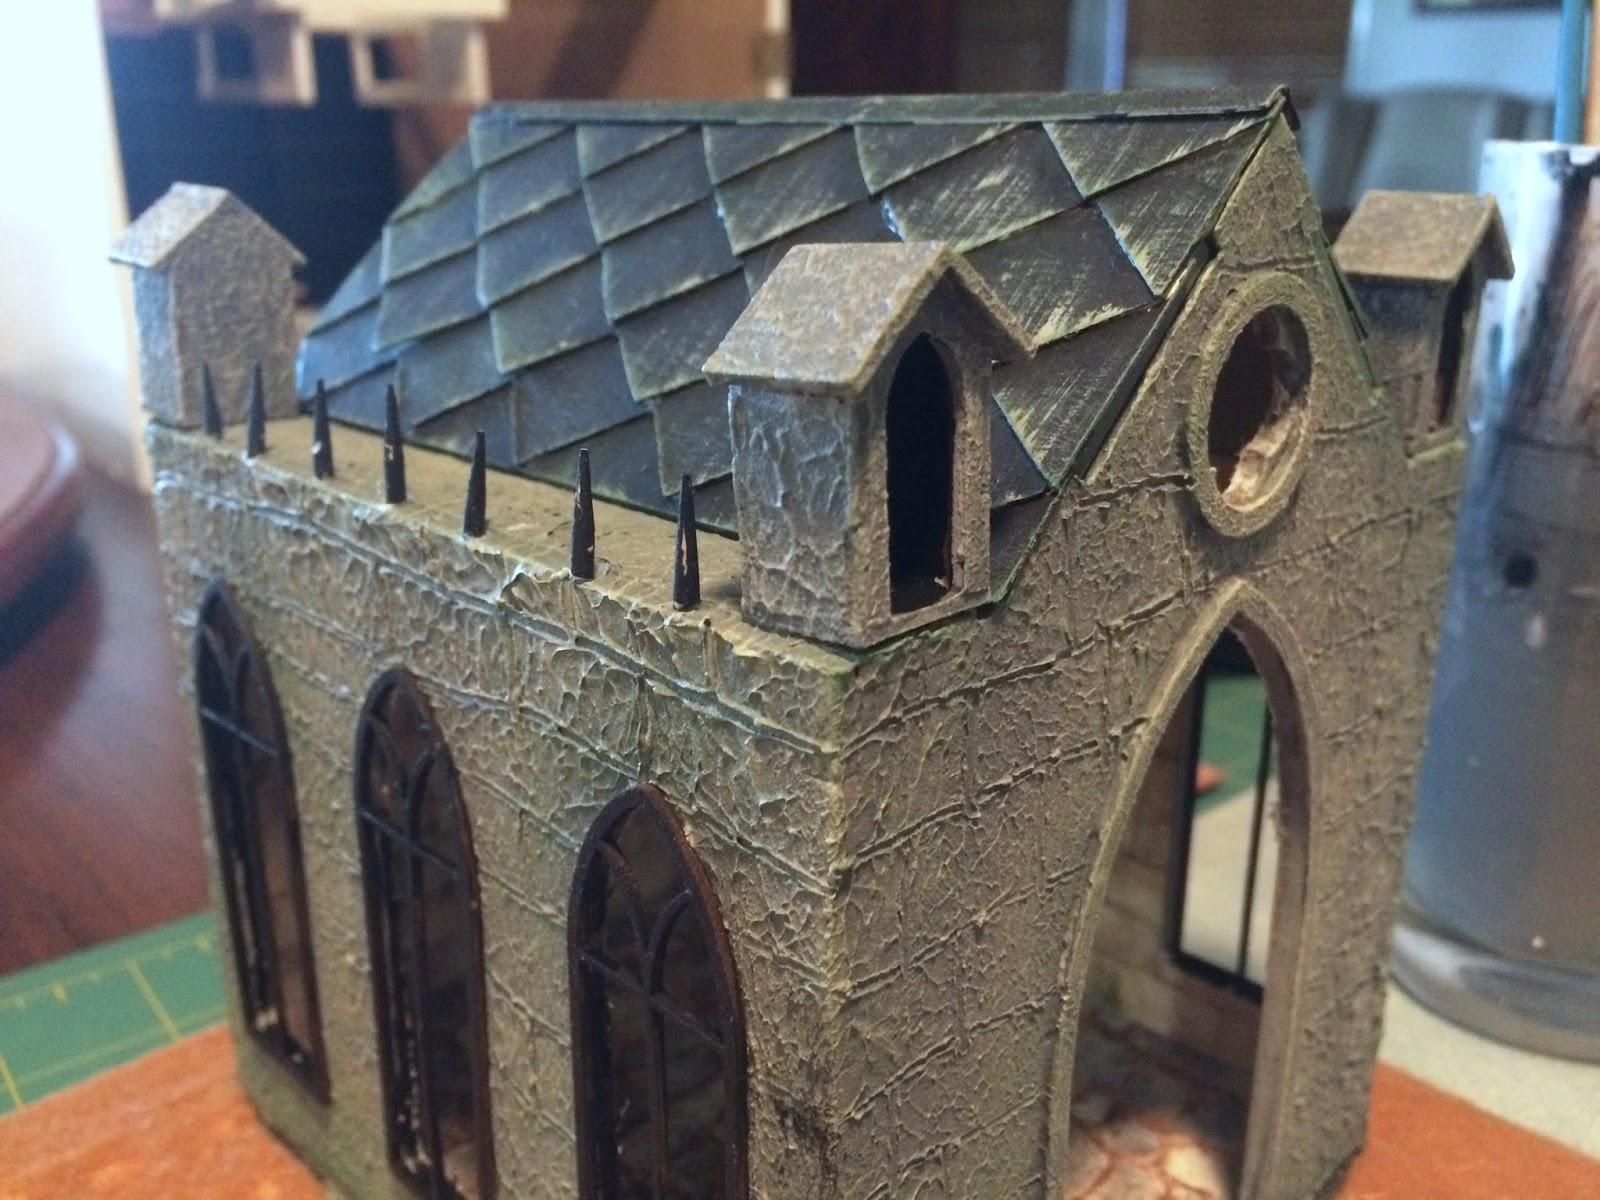

The turrets needed a little something too, but all I could find in my stash that would fit was this little skull. Looking better :-) I think it might have come from a Spooky Town kit too.


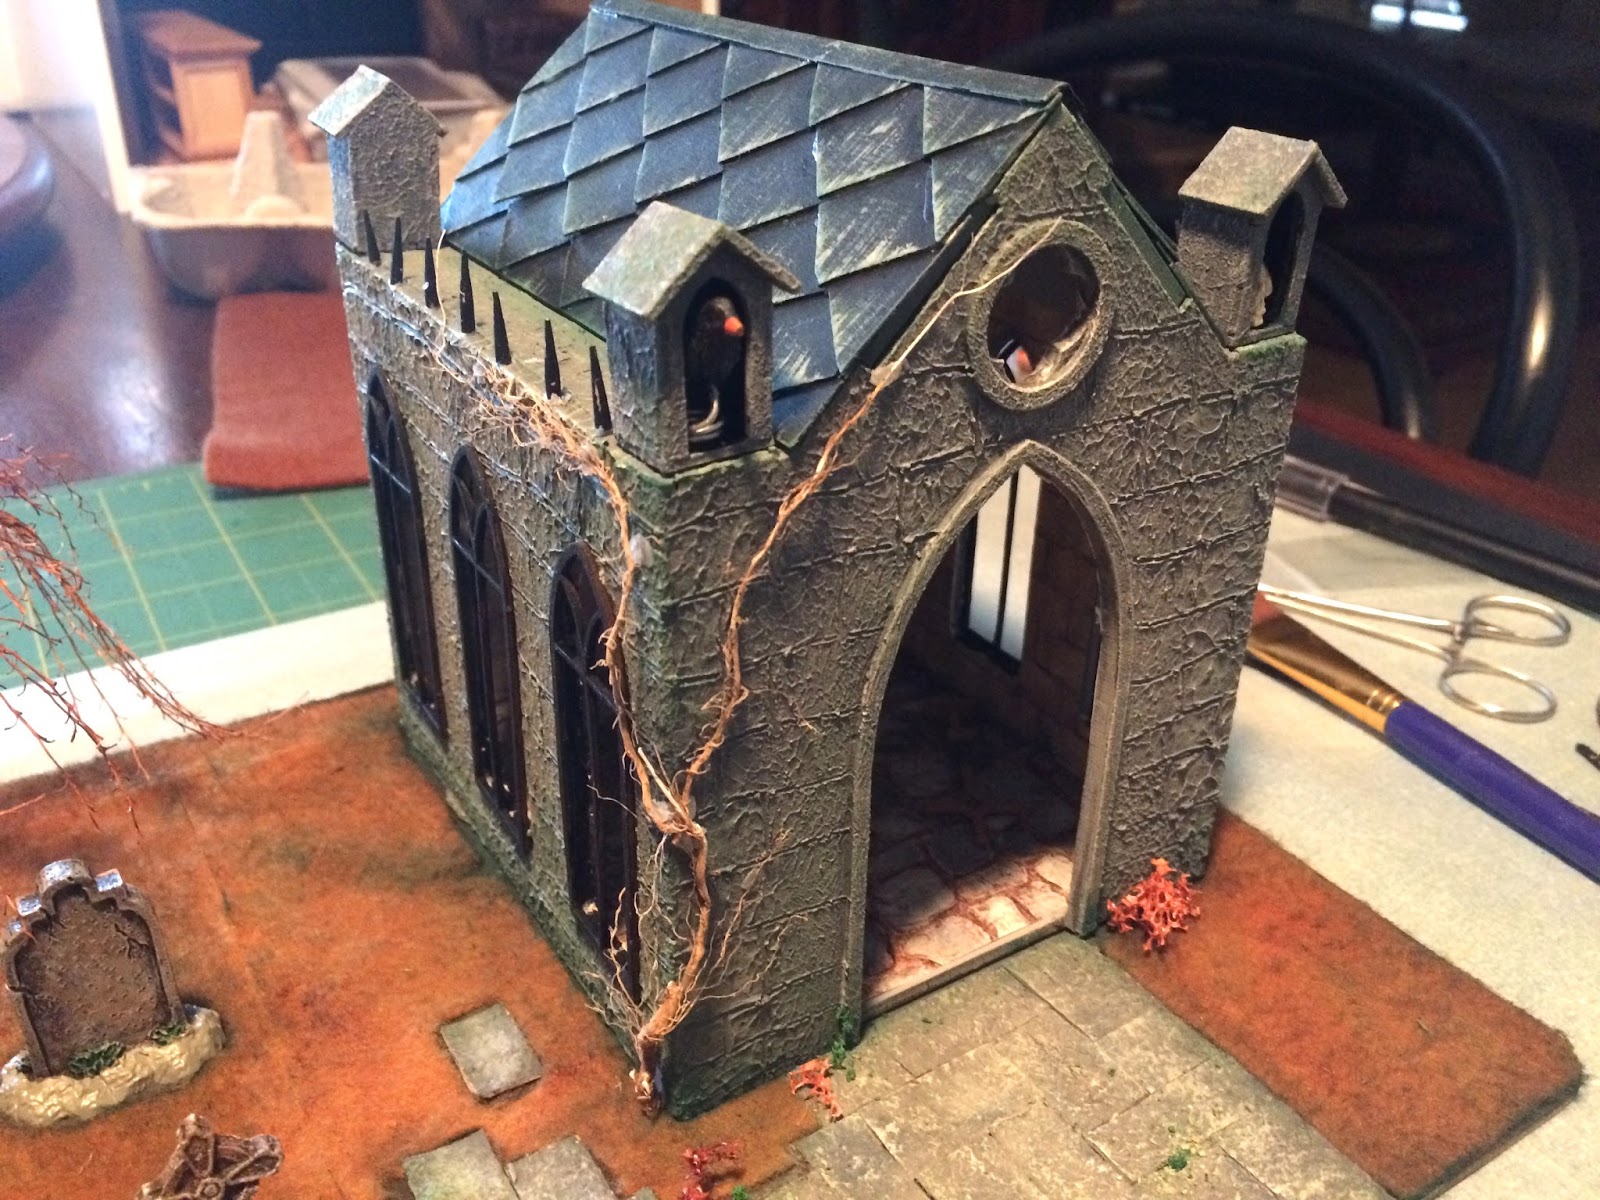
As you can see from the last pic, it was now time to move onto landscaping the diorama :-) I started by painting the board (which is a plain craftboard placemat from the craft section of Bunnings) a dark brown. Leaving spaces for the headstones, tree, the path and the Mausoleum, I covered the rest with pumpkin-orange thin acrylic felt which I pulled from my stash. Although it's not it's Autumn here in Australia at this time of year, I wanted to go with a dead-foliage and grass look.
I then made the pathway from pieces of egg carton, cut into rectangles, painted grey and then highlighted with off-white acrylic paint - similar to the exterior of the Mausoleum - to simulate stone pavers.

With the Lemax Spooky Town headstones, tree and the Mausoleum in place, the Halloween diorama is starting to take shape!


I added a dead vine to the exterior, using a dead root from a weed (which I had purposely set aside to dry the last time I did the weeding in the garden :-), which I attached using Tacky Wax. I started using hot glue but it left really obvious blobs of glue.


Next up, the rest of the landscaping!
No comments:
Post a Comment