Sunday, 22 October 2017

The Mini Mausoleum: Part 2

After the texture paste dried on the exterior of the mausoleum, it was time to paint it!  I still haven't glued the roof pieces on, so I can get access to the inside.

I used a combination of my model paints on the exterior, starting with the darkest greys and working up to a dry-brushed coat of off-white.

Here you can see it before the final highlighting. From memory, the paints I used were mainly Vallejo Gunmetal Grey, Cold Grey and Coldmetal Grey, with Bone White as the highlighter.


To the roof tiles, I added highlighting with Bone White and Sap Green, to mimic moss.  I also ended up adding raw earth and sap green to the bottoms of the walls to mimic dirt and moss, although it hard to see in the photos.


After painting, I decided to add some stone-effect paper to the flooring and walls of the interior.   I was going to try stenciling with paperclay, but eventually decided that with the doors on, you wouldn't be able to see it clearly enough to make the effort worthwhile :-)


I really love the wood cross. It is 1:12 scale, but looks good as an oversize wall piece in the 1:48 scale Mausoleum.  It was from Ryan's Realm.


 For a bit of fun, I added a tiny rubber snake from a Lemax Spooky Town collection, and a cross from a model train scale box of figures I had bought for my terrarium.


Next up, it was time for the front doors.  I used the piece of board which had I popped out from the doorway on the front wall of the kit. I cut it in half, scored lines to indicate boards, and painted and weathered it. The paint was predominantly Jo Sonja Raw Earth, with a bit of Sap Green at the bottom.


I used a black acrylic wash over the paint, and when it was dry I added door handles.  I used two jump rings from my stash of jewellery findings, and attached them using thin strips of cardboard folded in half and glued to the door.  When the glue dried, I gently dabbed on Tim Holtz distressing ink in Tarnished Brass.


The doors in place, below.  It's been hard to get good photos with all the overcast days we've been having :(


And here's a pic with the front two turrets in place.  I can't decide if I want the turrets or not, which is why I haven't painted them yet?


Friday, 20 October 2017

The Mini Mausoleum: Part 1

I bought this fabulous little quarter scale laser cut mausoleum from Alpha Stamps, which is my Halloween project this year!  Here it is in it's raw state, straight out of the bag.


Gluing it together with tacky glue was very quick, and here it is after an undercoat of acrylic paint in grey.  I left the roof off to aid in accessing the interior, and had a bit of a play around with some Lemax Spooky Hollow tombstones I bought a few years ago.  The base is a chipboard placemat from Bunnings.


I decided to add some shingles to the roof panels, so I made some diamond-shaped strips from cardboard, glued them on and painted them black as an undercoat.


After that, I decided that the exterior needed some stonework. I was originally planning to use cardboard egg cartons to make stones, but in the end I coated the mausoleum with Jo Sonja Texture Paste and roughed it up with an old bristle brush, then dragged in some rough lines with the end of the brush and left it to dry.


Looking good I think!

Monday, 9 October 2017

The Dressmaker's Cottage: Exterior Finished

So the exterior is finally finished and now I can move onto the interior decoration! 

These photos aren't the greatest as the lighting wasn't playing nicely with me, but they give you a pretty good overview of how the Cottage is coming along :-)


Saturday, 7 October 2017

The Dressmaker's Cottage: Exterior Trim, Painting & Landscaping

Gah, the cottage is getting so close to completion! All very exciting, but of course I will still have all of the inside to do, lol :-)

I have added a little timber capping to the chimney and have started on the trim under the eaves.  The chimney needs some more paint work at this stage, it's all too creamy, lol.


The chimney is looking a little better now, so I've begun painting the cladding in Antique White, with a light sanding in between to make it look a little more weathered and shabby.


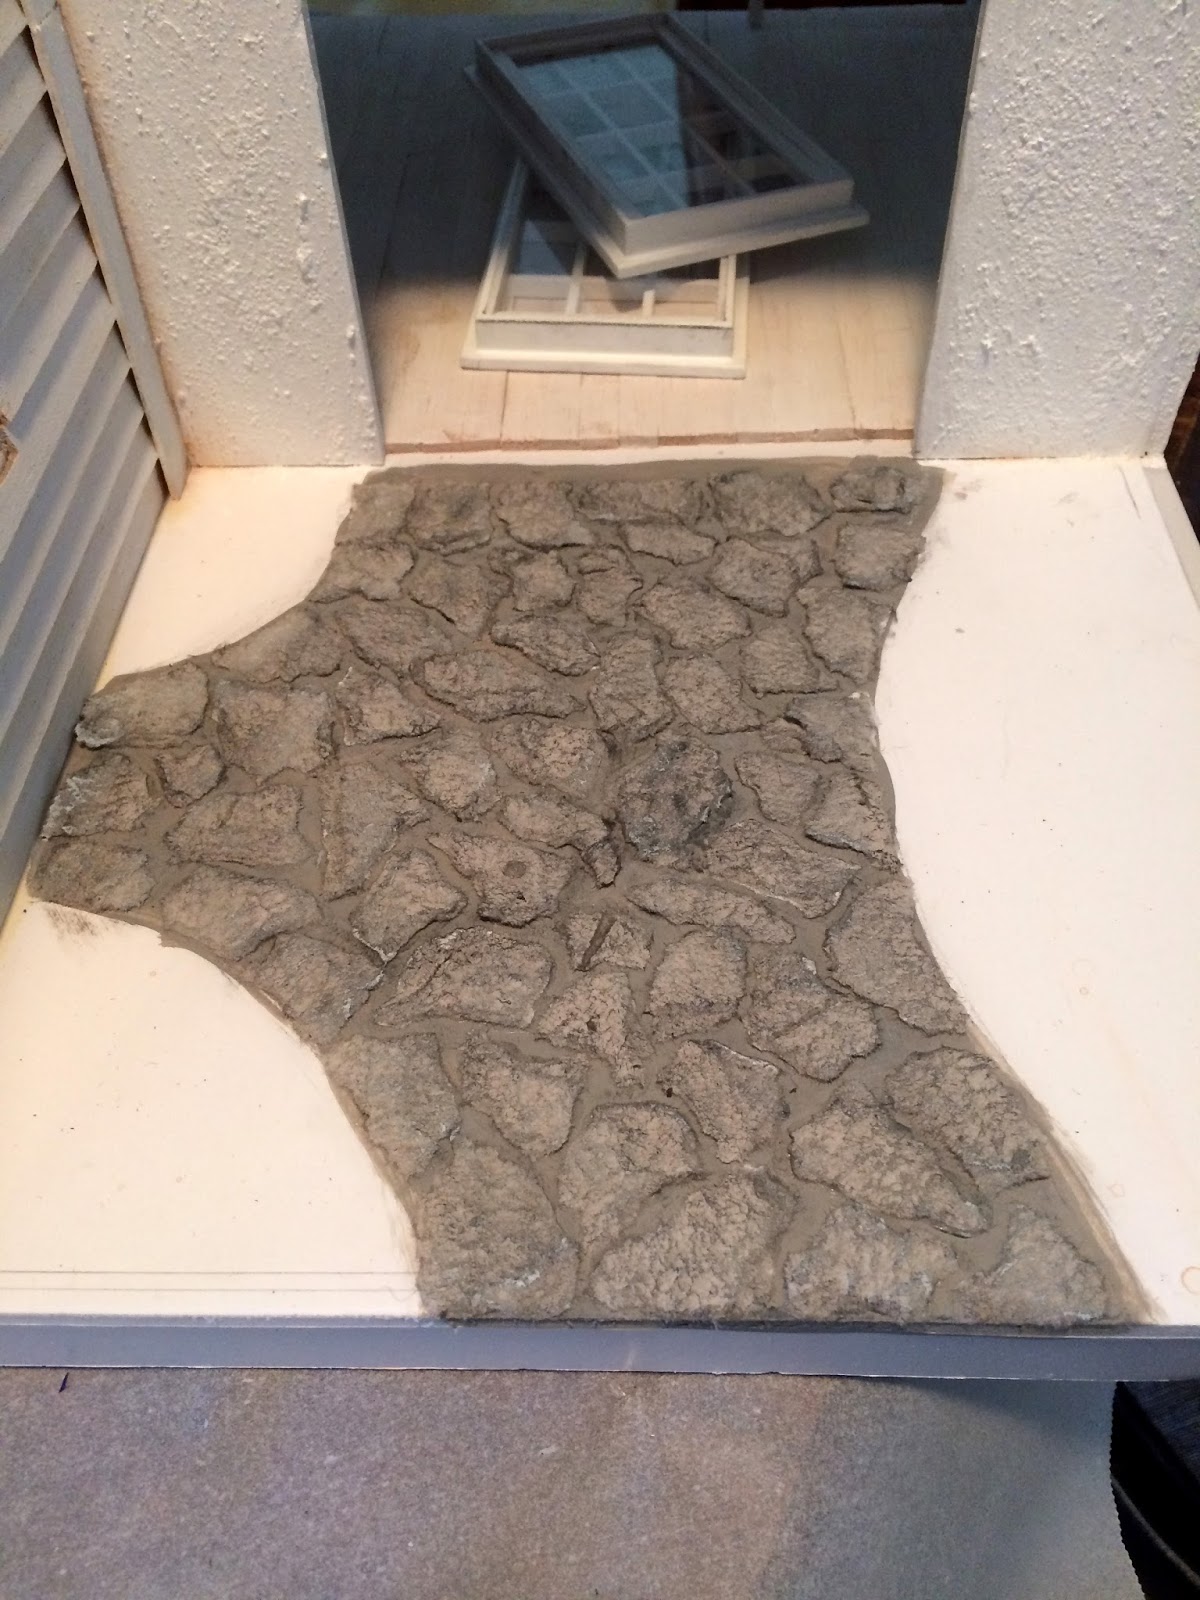
Now it's time for the front pathway in the courtyard.  I decided to do "crazy paving", made from egg cartons torn into rough shapes.  I painted the pathway with grey paint first and then glued the egg cartons "stones" onto the path like putting together a puzzle.


When the glue was dry,  I started painting the stonework in dark greys and browns.


Like the chimney stones, I sealed the "stones" with ModPodge, and then (when dry), I will grout the stones.


For a bit of detail on the sewing room gable, I made a little vent out of balsa offcuts and cardboard.  I made the inside piece out of a rectangle of cardboard cut to size, with regular slits cut almost to the edges.  I then inserted the tip of a scalpel into the bottom of each slit and eased it up to look like the vent edges.


Oh my gosh, the number of times I repainted this front door is embarrassing!!  I knew I wanted a weathered, shabby chic look which is quite easy to achieve with sanding and rough painting... but I could NOT decide on a final colour!  Lucky for me, each layer of paint colour just adds to the patina, LOL.  I think I have finally settled on this pretty grey-blue.  I will paint the door handles to age them too, so they won't be so shiny and new-looking ;-)


Here, the doors are in place, and the grout has dried on the crazy paving.  I've cut faux grass inserts from a roll of artificial moss from Spotlight, and the pre-made picket fence is from eBay.  The moss was a little thick, so I peeled the black foam backing off it, before gluing it to the foam board base.


The awning over the front door is glued in place with hot glue.  I went through a couple of different covers and colours for the awning before deciding on this paper, which I ModPodged to seal.  I trimmed the edges with pinking shears.


At this point you can see that I've also painted the roof shingles - I forgot to take a photo!  There was a lot of fluffing about with colour washes and I've made a lot of mistakes, but I'm running out of time to do much more so it will have to stay as it is for now :-)

Now I've taken a piece of fern garland I bought from Alpha Stamps (they don't appear to sell it any more, which I am really bummed about) and hot glued it across the awning.  I also had some shrubs I bought from Minimum World which I added to the grass.  I think it's starting to look good!


Here you can see I have glued the timber framing to the base and have puttied the joins on the corners.  It just needs some paint - although I am yet to decide on a colour, lol.  I have added some scenic scatter around the edges of the grass (and in spots across the roof tiles) to resemble moss.


As a little treat, on the corner of the awning I added a tiny birds nest with eggs, which I found in an Etsy shop :-)


Caroline uses a wonderful-looking (and cheap!) faux greenery garland as her vines, but despite extensive searching, I couldn't find anything similar here in Australia.  I made the vine on this side of the cottage from a branch trimmed from this garland from Spotlight, which I bought on sale.

You can also see below, that I finally decided on a French grey-blue paint for the timber base trim :-)


Oh my gosh, just a few final touches, and the outside is almost done!!