Thursday, 31 March 2016

Inspiration Board: Art Deco Exteriors

I thought I would have a looks at some of the examples of Art Deco homes on the internet. I did find a few that had brick exteriors, but the majority seem to be rendered in - mostly - pale neutrals; whites, creams, greys. 

Source

The facade of this house below, with the orange windows is pretty fabulous! I also particularly like the roof over the upstairs patio: it could look nice over the conservatory.


Source

Source

The very pale grey render and the gold features is also quite striking here, although I can't say I like the pale yellow window frames much.


Source

This place below clearly needs some love, but I like the brick features of the foundations and t he detailing on the roof corners.


Source
 Bricks & render unit building. I love the porch railing and roof. I think a brick exterior would be better suited to the industrial (rather than residential) feel I am going for?  Hmn.


Source

 I like the little porch roof over the upstairs door on this house in Melbourne.


Source

All good food for thought!

1:24 Art Deco House Kit

I've started the ball rolling on a new project, a 1:24 scale Art Deco house. I've ordered it, and the matching conservatory and it's on it's way!

Front View A

Front view B

Inside

Conservatory

I would have preferred to work in 1:12 scale for my next project, but I have been dying to go Art Deco for months and this kit is made in Australia which makes shipping actually affordable! With our exchange rate being so appalling at the moment, having anything at all shipped from overseas is prohibitively expensive and I'm not quite brave enough (yet!) to have a go at making one from scratch. That will be my next project :-)

Anyway, as you can see, the shell has plenty of potential and I have numerous ideas, but haven't narrowed any down to specifics yet. I am even toying with an industrial office feel, with concrete and/or cast iron columns, at least for the downstairs. All very exciting!

Saturday, 26 March 2016

The Fairfield: Attic and balconies

I grouted the chimney today after sealing it yesterday. I tinted it with a little grey paint and it doesn't look too bad, although I need to give it another clean with a damp sponge to remove the rest of the spackle from the stones now that I look at it more closely!


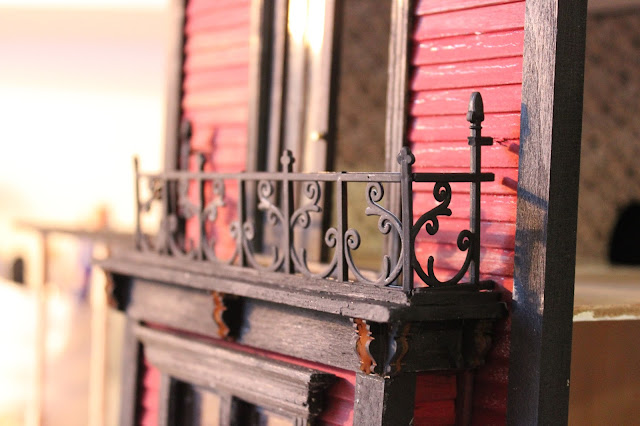
The I moved onto the balconies. I added trimming strips and painted them, and the plastic railing (to take the gloss off the plastic).  I'm still not a all thrilled with the style of the railing, but beggars can't be choosers, so I'm stuck with it for the moment. Using the trim strips means it isn't glued in, so perhaps I can upgrade it in the future if I ever find anything nice in 1:24 scale.


Front (bedroom) balcony

Just for fun I then glued some eave brackets onto the front balcony to see how they looked.  I'm unsure if I want to add more across the front or not?  Either way, I have ordered more, so I should have more than enough when they arrive.


Side (library) balcony


I decided I didn't like the brown paint on the attic end walls when it had dried, so I figured I would make up extra grout and use it as plaster instead, the same as in the kitchen.  I added extra grey paint to the grout (spackle mix) I used for the chimney and painted it on. It looks rather Tudor now against the timber, lol. I will age it with some paint washes later, and it suits the Gothic window, so I am happy with it.


Front wall

Back wall


It all looks very clean for a supposedly old, haunted attic, ha ha.

I also grabbed the porch posts which were sitting on top of a box of bits and pieces, and cut them to size for the verandah.


That let me take the measurements for porch brackets. Since I had to order more eave brackets, I decided to buy some porch brackets and gable ends as well. I would have liked longer brackets to make them stretch from one post to the next, but the ones I have ordered should look OK. I tried to tie them in with the balcony railing, although it will be interesting to see how they look!  In contrast, they look nothing like the gable ends I ordered! Ha, I had the choice of one adjustable or one end of the correct size and pitch, so I ordered three of the latter. Meh.  Half scale is convenient size-wise BUT it is difficult to source components that are as nice as those in regular scale.

Speaking if which, I need to do something about the railing on the top of the porch. The plastic rail I have for the balconies is way too big, I need something about half that size.  At this point I am just tempted to put the kit roof on it!

And I haven't decided how to finish the porch floor. More thought required.

Friday, 25 March 2016

The Fairfield: Attic Work

Today I sealed the chimney with Mod Podge, and added strips of basswood to the rear of the attic roof and stained them.  I am debating whether to add horizontal strips as well? I think I like it as it is at the moment - I can always add them later.

I'm going to have to address this piece of wall where I has to prize the cladding off. It's painted so I can't stain it to match the roof without sanding the paint off - which would be a pain in the proverbial. I might have to insert a small strip of 1mm basswood and stain it to match. I have small sections of stripwood to glue onto it to match into the roof strips.


I then started to trim bits off the wall cladding to make the roof pieces fit together tightly - an issue when the roof pieces are a little warped by now. There is a big gap between the bottom of the two rear roof pieces (rear when you are looking at the back of the house). The gap in the photo looks bigger than it is because I haven't pushed the top piece as close as it can get.  I *really* don't know what I am going to do about that because the walls are stained!  I guess a piece of 90' corner angle will cover it up? And then stain it to match the wall...


I then went over the scored lines on the library ceiling with black marker to make them more pronounced, which worked reasonably well. I also stained the eaves to darken the scored "board" edges and take away the raw wood look I was worried about yesterday. Much better!


I sanded the wood putty on the balconies and painted the end walls of the attic Burnt Umber (over the black undercoat). I'm not sure how it will look when it is dry but I can't stain them like the rear wall as I had previously undercoated them in black. I thought maybe the brown would tie them into the rear section if I add strips over the top?

Thursday, 24 March 2016

The Fairfield: Plugging Away

I spent another couple of hours plugging away at the little things again today.  I finished the first couple of coats of paint on the chimney, which is good. I'm not totally happy with how it is going so far, but then, more paint is likely to fix it up!  I am waiting for this coat to dry before I seal it tomorrow, and then grout it.  I am trying to get a lighter colour for the stones which are inside the attic, and a darker, more weathered tone for the exterior stones. I'm not sure that it's working, but I plan to add some black "soot" around the top anyway, and most likely some moss as well.


After the painting, I had a look at the corbels I ordered last year.  Unfortunately the larger ones are WAY too big for this project, and I don't have enough of the smaller ones to do the whole house, which is annoying.  I had a quick look back at the Heritage Laserworks website and they have a couple of new gable trims which actually might fit my house, so ordering another couple of bags of corbels might not be so bad if I can get some gable trim too.

After checking the corbel size, I knew that the balconies have to be larger, so I added 1/4" basswood strips to the outer edges and then puttied the gaps.


 I have been deliberating for ages on what surface the balconies should have, but I think I will just go for a weathered, stained concrete look. Not period-appropriate, but easy, and you won't see much of it once the railing is installed. I think I will run a small strip of trim just inside the outer edge to keep the railing in place.

After that I went to town on the eaves with a wire brush and chisel to enhance the aged timber planks look. I can't decide whether to paint them with crackle glaze or leave them as is? The exposed timber looks too fresh so I am deliberating on aging it somehow - maybe a grey paint wash? Or maybe crackle glaze and then a grey top coat?


I am pretty keen to get the trim finished, so I ended up placing an order for a couple more pieces of angle trim from a local supplier (with expensive post - annoying). I grabbed a laser-cut fireplace kit which looks vaguely Art Deco, and a dining table kit which will serve as the meeting table. They also had some tiny laser-cut dentil trim which I may add to the cornices.


Wednesday, 23 March 2016

The Fairfield: Chimney

So today I finished the egg carton stonework on the chimney - it's FAR from perfect, but I have decided that there is no point in being stuck on this project for fear of making a mistake, because the first time for everything is always a learning experience.  I am considering a couple of small chimney pots for the top?

The glue is drying and next time I work on it, I will get the base coats of paint done so that I can concentrate on getting the roof on.


There is so much to do in terms of little fiddly things, so I worked pretty consistently for a couple of hours on a few things.  I glued the trim to the third gable edges, fixed and puttied the tower wall where I had to prise the siding off because I had forgotten it is part of the attic wall.

I also puttied the edges of the roof pieces and around the attic windows, scored the boards that will show under the eaves and applied black wax to those edges to fill in the raw wood colour of the marks from being scored. I also tried the black wax on the attic roof, but it didn't work as well as I had hoped. It filled in every grain line, instead of just the scored marks so I've lost the "boards" on that section - I left it as it in the library roof section. It still looks OK, so I am not worried.

Just to see what it looks like, I popped out the internal frame pieces of the tower roof and inserted them into the roof floor. Ideally I would still like it to be higher, but for now, I just want to get the rest of the roof on.

So, the plan at the moment is:
  1. Paint the chimney.
  2. Glue the roof on.
  3. Guttering.
  4. Add the corbels.
  5. Tile the roof.

Tuesday, 22 March 2016

The Fairfield: Time Flies...

Whoosh! There goes more than half a year, without working on my dollhouse. I ran out of the creative spark to start with, and then my craft table got hijacked for other purposes and the house was packed away.

It's been so long I actually have almost no idea where I was up to, let alone what my plans were! I know I was adding lots of exterior trim, and evidently, I did end up ordering two different sized corbels from Heritage Laserworks for the gutter trim detail. I think that all arrived some time after I had stopped working on it, so it was stuck on the back burner.

Now I'm not really sure where to start back up on it again! I guess finishing off the chimney would be a good start, because I can't get the roof on until it's done. I think I stopped because I really didn't like the way the faux stone was coming along, and I didn't know if switching to faux brick would contrast too much with the stone foundations? Plus, prising the egg carton off didn't seem like much fun... Ah well, it's worth the pain if I am not going to be happy with the end result if I persist!


Later:
Indeed, prising off the egg carton was going to be a royal pain in the proverbial, so I continued with the stone work. I've added a small bump-out to the top of the chimney, and I'll probably add a chimney pot later (or maybe a gargoyle?). I've got probably one third of the gluing to go, and then I will start with the paint washes before I put the roof on.